Thursday, December 4, 2008

LWX & LWY/Electrical Conduit

I've read of a lot of people having issues with the angles and lengths of LWX and LWY. Thankfully, I was able to learn from their issues and had relatively little trouble in putting the pieces in place. Basically I cut everything a little bit oversized and over angled and then sanded till I had a good fit. Also, instead of using nails to hold them in place I used drywall screws. After everything had cured I removed the screws and filled the holes with flox.
Port:

Starboard:

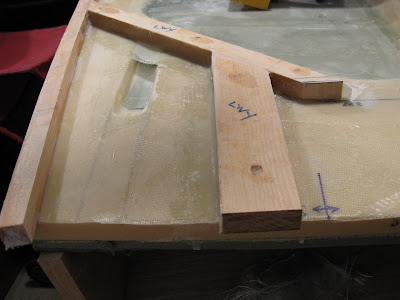
A closeup of the joint between LXY and LWY:


For the electrical conduit I followed the plans and formed a male plug which I covered with box tape. After taping the plug and the board I would be working on, I put one ply bid over the plug:


Then covered with peel ply:

Here's the conduit extension on top of the foam :


And five-minute epoxied in place:


Now I just need to place the foam around the conduit, add 6 plies of Bid, fix one minor repair area on the upper longeron and cut the sides to size and I'll be finished with ch. 5. Hopefully by next Wednesday!

Lower Longeron Doublers


The lower longeron doublers were pretty easy. The idea is to provide a square section for strength and to create the area for the electrical conduit area. Basically just floxing another triangular piece of spruce onto the lower longeron.


I used lots of clamps -


And the finished product -

Upper Longerons Glassed and Lower Longerons in place

It's been a while since I posted due to a wonderful new addition to the family - Alyssa Faith Bennett was born on September 11 and has been keeping us all pretty busy. I have been able to get a little bit of work done though. I got the upper longerons glassed:


Then cut and placed the lower longerons. I used the method of cutting little blocks of wood to get a good clamp on as well as pre-drilled holes for nails to hold everything in its proper place.
Starboard side:


And Port: